Street performances are bursts of unexpected art in our everyday lives. Capturing these fleeting moments on camera can be incredibly rewarding, but it also presents unique challenges.
From managing unpredictable lighting and sound to respecting the performers’ space and the audience’s experience, there’s a lot to consider. I’ve spent countless hours trying to get that perfect shot, and let me tell you, it’s not always easy.
The key is to be prepared, adaptable, and most importantly, respectful. Let’s dive into the specifics to help you nail those street performance shots.
Let’s explore this topic in detail below!
Alright, let’s craft an engaging blog post about capturing stunning street performance photos.
Mastering the Art of Stealth: Positioning is Key

Getting the perfect shot often means being in the right place at the right time. But in the chaotic environment of street performances, finding that sweet spot can be tricky.
It’s not just about having a clear line of sight; it’s about anticipating the performers’ movements and positioning yourself to capture those fleeting moments of artistic brilliance.
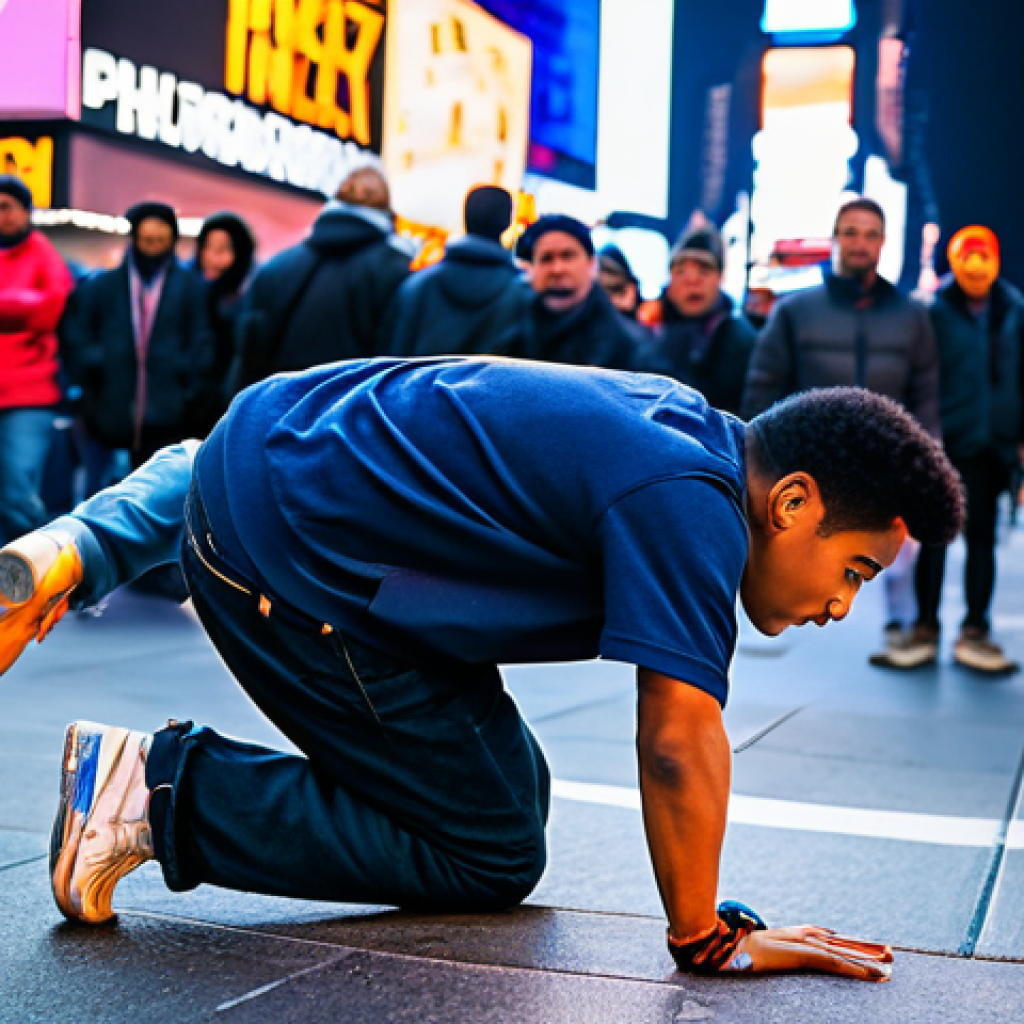
I once spent an entire afternoon chasing a breakdancing crew through Times Square, constantly adjusting my position to avoid getting blocked by the crowd.
It was exhausting, but the shots I got were worth it.
Finding Your Angle in the Crowd
The trick is to scout the area beforehand. Observe the performance space and identify potential vantage points. Look for elevated positions like steps or benches, or try to find gaps in the crowd where you can squeeze through.
Don’t be afraid to move around during the performance, but do so respectfully and avoid obstructing the view of other audience members. I usually try to arrive early to stake out my spot, or I’ll slowly and politely weave my way through the crowd while keeping my camera ready.
It’s a delicate dance, but essential for getting those unobstructed shots.
Respecting the Performance Space
Remember, you’re a guest in the performer’s space. Be mindful of your movements and avoid getting too close or being disruptive. Never use flash photography, as it can distract the performers and ruin the atmosphere.
I always make it a point to make eye contact and offer a smile to the performers before I start shooting, just to acknowledge their presence and show my respect.
A little courtesy goes a long way. It’s also wise to observe the unspoken rules of the venue. Some performers might have specific requests or restrictions on photography, so pay attention to any signs or announcements.
Using Your Camera Strap Wisely
Camera straps aren’t just for preventing accidental drops; they can also be used to stabilize your camera in tight situations. Try wrapping the strap around your wrist or neck to create a tighter grip.
This can help reduce camera shake and improve your chances of getting a sharp image, especially in low-light conditions. I often loop my camera strap around my elbow for extra stability when shooting handheld.
It’s a simple trick, but it can make a big difference, especially when you’re crammed into a crowded space trying to get a steady shot.
Taming the Light: Conquering Unpredictable Illumination
Street performances happen in all sorts of lighting conditions, from harsh midday sun to dimly lit evenings. Mastering the art of dealing with unpredictable illumination is crucial for capturing high-quality images.
I’ve learned the hard way that relying on automatic settings can lead to blown-out highlights or murky shadows. Taking control of your camera’s settings and understanding the principles of exposure is key.
Mastering Exposure Compensation
Exposure compensation is your best friend when dealing with tricky lighting. This setting allows you to fine-tune the brightness of your images, even when shooting in automatic modes.
If your photos are consistently too bright, dial down the exposure compensation. If they’re too dark, dial it up. It’s a simple adjustment that can make a huge difference in the final result.
I usually start by taking a test shot and then adjust the exposure compensation until I get the desired brightness. It’s a bit of trial and error, but it’s worth the effort.
Embracing High ISO
Don’t be afraid to crank up the ISO when shooting in low light. While higher ISO settings can introduce noise into your images, they also allow you to use faster shutter speeds, which can help freeze motion and prevent blurry photos.
Modern cameras are incredibly good at handling high ISO noise, so don’t be afraid to push the limits. I often shoot at ISO 3200 or even higher when capturing evening performances.
The key is to find the sweet spot where you can balance image quality and sharpness.
Finding Natural Reflectors
Look for natural reflectors like light-colored walls or pavement that can bounce light back onto the performers. These reflectors can help fill in shadows and create a more balanced exposure.
I often position myself near a brightly lit building or storefront to take advantage of the reflected light. It’s a subtle technique, but it can add a touch of magic to your images.
For example, shooting near a white building can really brighten up the subject’s face and give the image a more professional look.
Capturing the Sound: Minimizing Audio Distractions
While photography is primarily a visual medium, the audio environment of a street performance can also play a role in your final product. Unwanted noises like traffic or crowd chatter can be distracting and detract from the overall experience.
While you can’t always eliminate these noises completely, there are steps you can take to minimize their impact.
Focusing on the Visual Story
Sometimes, the best way to deal with audio distractions is to simply focus on the visual story you’re trying to tell. Frame your shots in a way that minimizes the presence of distracting elements in the background.
Use shallow depth of field to blur out distracting elements and draw attention to the performer. I often try to find angles that isolate the performer against a clean background, which helps to minimize the impact of unwanted noises.
The visual narrative should be so compelling that the audio fades into the background.
Choosing the Right Moment
Be patient and wait for the right moment to capture your shot. Sometimes, there will be brief lulls in the noise, such as when the performer pauses between songs or when the crowd momentarily quiets down.
These moments are ideal for capturing clean, impactful images. I usually try to anticipate these lulls by observing the performance and paying attention to the rhythm of the crowd.
It’s all about timing.
Utilizing Editing Software
Editing software can be a powerful tool for minimizing audio distractions. You can use noise reduction tools to reduce the impact of unwanted sounds in your images.
You can also use selective editing techniques to darken or blur distracting elements in the background. While editing can’t completely eliminate audio distractions, it can certainly help to minimize their impact and create a more polished final product.
Respecting the Performers: Boundaries and Courtesies
Street performers are artists, and they deserve to be treated with respect. Always be mindful of their boundaries and avoid doing anything that could be disruptive or disrespectful.
This includes asking for permission before taking their photo, avoiding flash photography, and offering them compensation for their time and effort. I always make it a point to approach the performers after the show to thank them for their performance and offer them a small donation.
Seeking Permission
Before you start snapping away, take a moment to ask the performers for permission to take their photo. This simple act of courtesy can go a long way in building trust and rapport.
Most performers will be happy to oblige, as long as you’re respectful and unobtrusive. If they decline, respect their wishes and move on. I usually approach the performers with a smile and a friendly greeting, explaining that I’m a photographer and that I admire their work.
It’s a simple gesture, but it shows that you value their artistry.
Offering Compensation
Street performers often rely on tips and donations to make a living. If you’re taking their photo, it’s only fair to offer them some form of compensation.
This could be a small cash donation or even a social media shoutout. It’s a way of showing your appreciation for their time and effort, and it helps to support their art.
I usually carry a few dollar bills in my pocket specifically for this purpose. It’s a small price to pay for the opportunity to capture their talent.
Sharing Your Work
After you’ve captured your photos, consider sharing them with the performers. This is a great way to show your appreciation for their art and to help them promote their work.
You can share your photos on social media, tag them in your posts, or even offer to give them prints of your images. I often send the performers a link to my online gallery, so they can download and use the images for their own promotional purposes.
It’s a win-win situation for everyone involved.
Gear Essentials for Street Photography: Keeping it Light
Carrying a ton of heavy equipment can be a burden when shooting street performances. It’s important to keep your gear light and versatile so you can move freely and adapt to different shooting situations.
Prime Lenses
Prime lenses are a great choice for street photography because they’re lightweight, compact, and offer excellent image quality. A fast prime lens like a 35mm or 50mm is perfect for capturing candid moments and portraits.
Versatile Zoom Lens
A versatile zoom lens like a 24-70mm or 24-105mm can be a great all-in-one option for street photography. It allows you to zoom in and out to capture different perspectives without having to change lenses.
Compact Camera
A compact camera with a large sensor can be a great alternative to a DSLR or mirrorless camera. It’s small, lightweight, and easy to carry around, making it perfect for discreet street photography.
Here’s a table summarizing the recommended gear for street photography:
| Gear Type | Description | Pros | Cons |
|---|---|---|---|
| Prime Lenses | 35mm or 50mm | Lightweight, excellent image quality | Less versatile than zoom lenses |
| Versatile Zoom Lens | 24-70mm or 24-105mm | All-in-one option, flexible | Heavier, potentially lower image quality than primes |
| Compact Camera | Large sensor | Small, lightweight, discreet | Limited features compared to DSLRs |
Storytelling Through Composition: Engaging the Viewer
Composition is key to creating compelling street photography. Use leading lines, symmetry, and the rule of thirds to draw the viewer’s eye and tell a story.
Framing the Scene
Use elements in the environment to frame your subject and add depth to your images. This could be an archway, a doorway, or even a group of people.
Capturing Expressions
Focus on capturing the emotions and expressions of the performers. These fleeting moments can tell a powerful story and create a connection with the viewer.
Utilizing Depth of Field
Use shallow depth of field to blur the background and draw attention to the performer. This can help to isolate your subject and create a sense of intimacy.
Post-Processing Techniques: Enhancing the Narrative
Post-processing is an essential part of the photography process. Use editing software to enhance the colors, contrast, and sharpness of your images.
Color Correction
Adjust the white balance and color temperature to create a natural-looking image. You can also use color grading techniques to add a specific mood or style to your photos.
Sharpening
Sharpen your images to enhance the details and create a sense of clarity. Be careful not to over-sharpen, as this can introduce artifacts and make your photos look unnatural.
Noise Reduction
Use noise reduction tools to minimize the appearance of noise in your images. This is especially important when shooting in low light or at high ISO settings.
By following these tips, you can capture stunning street performance photos that tell a story and capture the energy of the moment. Remember to be respectful, adaptable, and always be on the lookout for those fleeting moments of artistic brilliance.
Mastering the art of street performance photography is a journey of observation, adaptation, and respect. Armed with the right techniques and a keen eye, you can capture the vibrant energy and raw emotion of these unique performances.
Remember, it’s not just about taking pictures; it’s about telling stories and preserving moments in time. Now, go out there, explore, and capture the soul of the streets!
Wrapping Up
Street photography is more than just pointing and shooting; it’s about immersing yourself in the moment and capturing the essence of the performance. It’s a continuous learning process where every shot teaches you something new about light, composition, and human expression.
So, grab your camera, step onto the streets, and start creating! The world is your stage, and every street performance is a story waiting to be told. Let your lens be the storyteller, and the streets be your muse.
Handy Tips to Keep in Your Pocket
1. Always carry extra batteries and memory cards, you never know when inspiration will strike!
2. Learn to shoot in manual mode for maximum control over your camera settings. You’ll be glad you did when the lighting changes unexpectedly!
3. A small, discreet camera bag can make you blend in better and keep your gear safe from prying eyes.
4. Invest in a good quality lens cloth to keep your lens clean, especially in dusty environments. Smudges and fingerprints can ruin the sharpest shot!
5. Subscribe to photography blogs and forums to stay updated on the latest techniques and trends.
Key Takeaways
– Positioning: Scout your location, respect the performer’s space, and use your camera strap wisely.
– Lighting: Master exposure compensation, embrace high ISO, and find natural reflectors.
– Audio: Focus on the visual story, choose the right moment, and utilize editing software.
– Respect: Seek permission, offer compensation, and share your work with the performers.
– Gear: Keep it light with prime lenses, versatile zooms, or a compact camera.
Frequently Asked Questions (FAQ) 📖
Q: What’s the biggest challenge when photographing street performers?
A: Honestly, it’s a toss-up between unpredictable lighting and sound. One minute you’ve got gorgeous sunlight streaming down, and the next, a massive cloud rolls in, turning everything grey.
And the noise! Sirens, chatter, maybe even another musician nearby… it’s a constant battle to get a clean recording. I usually try to find spots with some consistent shade and bring a decent external mic if I’m planning on filming any audio, but even then, you’ve gotta be ready to improvise.
A lot of times, it’s about working with the chaos, rather than against it, and finding the beauty in the imperfections.
Q: How do you avoid being “that annoying photographer” when shooting street performances?
A: Oh man, this is so important. Nobody wants to be the person ruining the show for everyone else. For me, it’s all about respect.
First, I always try to observe the performer for a bit before I start snapping away. Get a feel for their style, their interactions with the audience.
Then, I try to be as unobtrusive as possible. That means using a zoom lens so I can keep my distance, avoiding flash photography like the plague, and definitely not blocking anyone’s view.
If I’m going to be there for a while, I’ll often drop a few bucks in their hat. It’s a small gesture, but it shows you appreciate what they’re doing. Basically, just be mindful and treat them like you’d want to be treated if you were the one putting on a show.
Q: Any quick tips for getting better street photography shots with just my phone?
A: Absolutely! Phones have come a long way. My go-to is to mess with the exposure settings.
Street performers often have a strong light source on them, and your phone might overexpose the shot, making it look washed out. Tap on the performer on your screen, and then drag the little sun icon down to darken the image.
Also, move around! Don’t just stand in one spot. Getting a low angle can make the performer look more dynamic, while shooting from a higher vantage point can give you a cool perspective of the crowd.
And finally, don’t be afraid to edit your photos afterward. A little bit of cropping and color correction can go a long way in turning a good shot into a great one.
There are tons of free editing apps out there, so experiment and have fun with it!
📚 References
Wikipedia Encyclopedia